Showing posts with label Winter. Show all posts

Monday, January 08, 2024

Trendy Bakers Twine~Thanks Snow Much Cards

Hello all, I am on the Trendy Twine blog today sharing a set of thank you cards perfect for sending out for those holiday gifts you received. The focal point of these cards are the adorable Round Holiday Snowman Tags which are great for all winter projects.
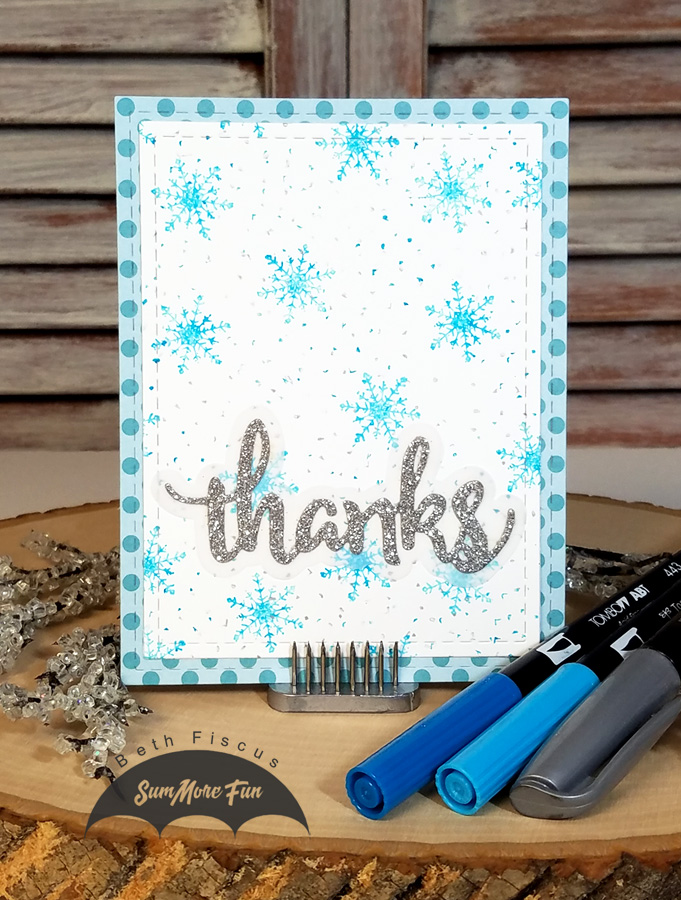
The layout sketch of these cards is the December 2023 SheetLoad of Cards sketch. patterned papers are from Bo Bunny's Candy Cane Lane 6x6 paper pad. I loved the soft color palette on those papers!
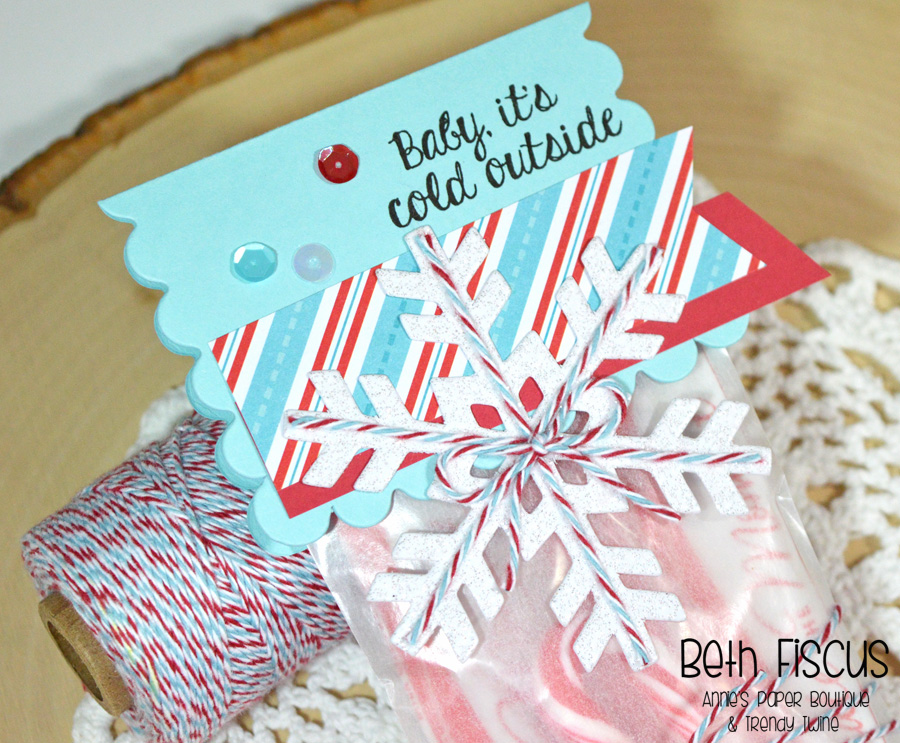
I did trim the Round Holiday Snowman Tags down a bit with a Cottage Cutz stitched circle die just to make them fit within the GMD Doily die better. I laced Raspberry Cupcake Trendy Twine through the doily on the first one and tied it into a bow at the bottom of the circle.
For the second card, I laced Twisted Lime Trendy Twine around the doily die. I adhered a sentiment stamped in gray ink from the APB Let It Snow stamp set under the doily. A trio of small gems were the finishing touch.
I also made a few more cards in the same style, same supplies, but without the Trendy Twine on these. Two of the snowman tags were more Christmas-y so I did add a Christmas sentiment to those and they will go into my stash for 2024 Christmas cards! It is never too early to start on those.
Here is a full look at the second set of cards.

Here's what I used from Annie's Paper Boutique:

I hope you have a wonderfully crafty day! 

If you are new to Trendy Twine, you will want to check out these fun places:
Shop for Trendy Twine HERE
Trendy Twine on Facebook
Trendy Twine on Instagram

Friday, December 25, 2020

Trendy Bakers Twine~Merry Christmas!

Merry Christmas!  Today the Trendy Twine design team members are sharing Christmas projects over on the Trendy Twine blog.  Make sure to hop over there to see them all!  Here is the project I created featuring our Trendy Twine twist of the month, Peppermint Icicle Trendy Twine. 

I started by using a Red Polka Dot Grid Candy Wrapper Kit with Hershey's Miniatures candy.  I wrapped every other candy with snowflake washi tape as well.  To decorate the outside of the bag (which is included in the candy wrapper kit), I added die cut snowflakes, Frosted Cranberry Sequins, and Peppermint Icicle Trendy Twine.  I then added a tag, which was a Kraft Metal Rim Tag that I added a white paper circle to and then stamped the sentiment from the Merry & Bright stamp set in ink that matched the blue in the Peppermint Icicle Trendy Twine.  Now it is is ready to put a smile on someone's face this Christmas!

Here's what I used from Annie's Paper Boutique:

Look at the beautiful winter samplers of Trendy Twine!

I hope you have a wonderfully crafty day! 

If you are new to Trendy Twine, you will want to check out these fun places:
Shop for Trendy Twine HERE
Follow Trendy Twine on Facebook

Wednesday, December 16, 2020

Winter Church Card

Hello all!  Today I am posting on the SumMore Fun blog.  It is with heavy hearts that we announce that SumMore Fun will be going out of business in January.  With that being said, you can grab lots of goodies at rock bottom prices until then!  Photopolymer sets for ONLY $5!   Shop now for the best selection.  I will continue to bring you weekly inspiration until the store is permanently closed.

I stamped the church from the O Holy Night stamp set with Versafine Onyx Black ink and heat embossed with clear powder, then cut around it and colored it with Artify markers.  The patterned papers are from The Paper Studio's Away in a Manger paper pad.  I used two oval die cuts to place behind the church.  The church was popped up with foam tape and I added gold Pearl Pen dots on the teal oval and snow marker to the church to embellish.  I didn't feel that this card needed a sentiment because of all the words on the background paper.  Don't you agree that the church stamp is very peaceful and welcoming?!

I hope you have a wonderfully crafty day!

New to SumMore Fun?
Check out the SumMore Fun Store
Use BETH10 as your discount code at checkout for 10% off.

You can find me at these links on Social Media:


This post contains some affiliate links that may generate a small commission to me at no extra cost to you.

Thursday, December 10, 2020

Trendy Bakers Twine~Snowflake Sweet Treat

 Hello all!  Today I am on the Trendy Twine blog with this cute treat that features our monthly spotlights of Peppermint Icicle Trendy Twine and a Biggie Glassine Envelope.

I started off by making the bag topper out of a Sky Scallop Note Card, a stamped sentiment from the Let It Snow stamp set, paper scraps, a die cut snowflake, and Frosted Cranberry Sequins.  I added Peppermint Icicle Trendy Twine to the snowflake and I really love how it looks!  I added a hot chocolate packet and a mini candy cane to the Biggie Glassine Envelope for a sweet treat. (I did fold over one long edge of the hot chocolate about 3/4" so it would slide into the envelope easily.)  I used Glue Dots to add the topper to the glassine envelope and finished it off with a couple wraps of Peppermint Icicle Trendy Twine around the envelope.

Here's what I used from Annie's Paper Boutique:

Look at the beautiful winter samplers of Trendy Twine!

I hope you have a wonderfully crafty day! 

If you are new to Trendy Twine, you will want to check out these fun places:
Shop for Trendy Twine HERE
Follow Trendy Twine on Facebook

Wednesday, December 09, 2020

Snowman Christmas Card

Hello all!  Today I am posting on the SumMore Fun blog.  It is with heavy hearts that we announce that SumMore Fun will be going out of business in January.  With that being said, you can grab lots of goodies at rock bottom prices until then!  Photopolymer sets for ONLY $5!   Shop now for the best selection.  I will continue to bring you weekly inspiration until the store is permanently closed.

For today's project, I used the following items from the previously relesased Holiday Glow Pack: Believe in Christmas photopolymer stamp set, dark green linen texture card base, white card base, and designer card stock.  I used GMD scalloped stitched rectangle die and CC scalloped stitched circle die with a green card base to create those card layers.  The patterned paper background was actually strips of leftover designer cardstock from the Holiday Glow Pack that I just adhered together and cut with a GMD stitched rectangle die.  I wrapped Holly Berry Trendy Twine around it before adhering it to the green layer.  The focal point included the snowman and sentiment from the Believe in Christmas stamp set and they were in black ink.  I colored the snowman with Artify alcohol markers.  It was die cut with a CC stitched circle die.  The finishing embellishment was two GMD silver foil enamel dots.

I hope you have a wonderfully crafty day!

New to SumMore Fun?
Check out the SumMore Fun Store
Use BETH10 as your discount code at checkout for 10% off.

You can find me at these links on Social Media:


This post contains some affiliate links that may generate a small commission to me at no extra cost to you.

Wednesday, December 02, 2020

Santa Claus Lane Card

Happy Wednesday!  Today I am posting on the SumMore Fun blog.  SumMore Fun recently released a new pack called the Holiday Glow Pack.  You can see all the pack has to offer below.


Contents of the Holiday Glow Pack include:

1 - Holiday Glow photopolymer stamp set
1 - O Holy Night photopolymer stamp set
1 - Believe in Christmas photopolymer stamp set
3 -dark green linen texture card bases
3 -white card bases
6 -dark green linen texture envelopes
5 -6” x 6” designer card stock
5 -3.5” x 8.5” designer card stock

Regular Retail Price Separately: $49.99.
Pack Price: $39.99

There is a limited number of these packs! There are no more packs after those sell out. Don't wait to grab it!

Here is what I created to share today:
This card uses the following items from the Holiday Glow PackHoliday Glow stamp set, and Believe in Christmas stamp set.  I started by stamping the lamp post from Holiday Glow with VersaFine Onyx Black ink and heat embossing it with WOW white pearl embossing powder.  It gives a dark metal look that I love!  I then stamped the sign shape in green and the street name in black.  I stamped the sleigh and reindeer silhouette from the Believe in Christmas stamp set in dark gray ink.

To create the snowy scene, I masked off a circle to look like a moon in the corner and proceeded to ink blend with the following Distress Oxides:  Fossilized AmberChipped Sapphire, and Black Soot.  Once it was blended how I liked, I used white pigment ink to stamp snowflakes from Holiday Glow all over the background.  I then splattered white acrylic paint on the background and added torn strips of white paper at the bottom to look like snow.  The finishing touch was adding Sky Glitter Pearl Pen dots all over the background and along the snow at the bottom.  It really added more sparkle and shine to the card!  I love how magical this scene turned out!


I hope you have a wonderfully crafty day!

New to SumMore Fun?
Check out the SumMore Fun Store
Use BETH10 as your discount code at checkout for 10% off.

You can find me at these links on Social Media:


This post contains some affiliate links that may generate a small commission to me at no extra cost to you.

Wednesday, January 16, 2019

Ice Skating Card

Good Morning!  Today is my day to post on the SumMore Fun blog.  The card I am sharing with you uses the Raisin Boat Winter Heart and Sole stamp set.
I created the winter woods scene using the pine tree from the Winter Heart and Sole stamp set and Distress Oxides in Pine Needles and Walnut Stain.  I stamped a tree, then did a second and even third generation stamping without re-inking.  I liked the feeling of depth that created.  Then I used an aqua brush and Pumice Stone Distress Oxide and made the ground around the trees.  The icy water was created by watering down Sapphire Swift Sparkling Unicorn Spit and painting it on the cardstock.  It is so shimmery in real life!  I then stamped the ice skates from Winter Heart and Sole in black and matted it with die cut circles.  I watercolored them with Pumice Stone Distress Oxide and undiluted Sapphire Swift Sparkling Unicorn Spit.  I added some In The Navy Trendy Twine and the sentiment stamp and the card was complete!

I hope you have a wonderfully crafty day!

New to SumMore Fun?
Click the store link below for an automatic 10% discount off your purchase!
Or use BETH10 as your discount code at checkout for 10% off.
Check out the SumMore Fun Store

You can find me at these links on Social Media:

Wednesday, January 09, 2019

Unassembled Snowman Card

Good Morning!  Today is my day to post on the SumMore Fun blog.  The card I am sharing with you uses the Victorine Originals Watercolor Snowman stamp set.
I created the background with light blue cardstock and cut "snowbanks" from the DCWV 6x6 Paper Lace stack.  Then I got to stamping!  I added the snowman arms and hat onto the background paper.  For the snowman circles, I die cut three sizes and stamped the face on the smallest and scarf on the medium one.  Inks used include Distress Oxides in Vintage Photo and Dusty Concord, Versafine Onyx Black and an orange marker.  The snowballs were popped up with foam tape for dimension.  Last, I added the sentiment on a white banner and added three glitter enamel dots.

I hope you have a wonderfully crafty day!

New to SumMore Fun?
Click the store link below for an automatic 10% discount off your purchase!
Or use BETH10 as your discount code at checkout for 10% off.
Check out the SumMore Fun Store

You can find me at these links on Social Media:

Monday, December 31, 2018

Shaped Snowman Card

Good morning to all my crafty friends!  Today is my day to post on the SVG Attic blog.  I have some thank you cards to send out after the holiday season, so this is one of those cards that I will be mailing.  The card file is from SVG Attic's Winter Illuminations kit.
This card was very easy to assemble!  I opted to use the front panel without the stitching holes.  I used patterned papers from DCWV's Blue Noel stack and a ribbon for the scarf.  Adhesives used include Scotch Tacky Glue and Glue Dots Glue Lines (for the ribbon).  I also stamped a sentiment from APB Let It Snow stamp set in black in the lower left corner.

I hope you have a wonderfully crafty day!

New to SVG Attic? Check out these awesome places!

Friday, December 28, 2018

Winter Thanks Card

Good Morning!
Due to medical reasons, SumMore Fun is making changes. They're liquidating the stamp sets and selling off the expo and red rubber side of the business. Know someone who might be interested? Have them contact SumMore Fun.

They're keeping the stamp rentals and the monthly clubs. If you want to rent their fabulous stamp set designs, visit www.rentsummorefun.com.

Subscribe to the SumMore Fun newsletter for details of which stamps are being discounted and when.

Because of this we will no longer be running monthly challenges. The design team will still be sharing their inspiration using our stamps so you can see the possibilities with them...

My inspiration card uses the Victorine Originals Watercolor Snowman set.
My use of markers was to use those instead of ink pads with the stamps to create this pretty background!  I used the lighter blue Tombow marker for the snowflakes and the darker blue and silver markers for the snowflake dots over the whole white paper.
Other products used were patterned paper, vellum, glitter paper, stitched rectangle dies, thanks dies and adhesives.

I hope you have a wonderfully crafty day!

New to SumMore Fun?
Click the store link below for an automatic 10% discount off your purchase!
Or use BETH10 as your discount code at checkout for 10% off.
Check out the SumMore Fun Store

You can find me at these links on Social Media:

Wednesday, December 26, 2018

Pine Tree Silhouette Card

Good Morning!  Today is my day to post on the SumMore Fun blog.  The card I am sharing with you uses their Raisin Boat Merry Nature stamp set.
I started out by stamping the trees and the sentiment using Versafine Onyx Black ink and embossing it with WOW White Pearl embossing powder.  It makes such a beautiful pearly silver look!  Then I used Distress Oxide inks in Faded Jeans, Broken China, and Black Soot to blend in a winter night look.
I splashed water on the background, making the Distress Oxides lift a bit, then added dots of liquid applique so it looked like snow.  I mounted the stamped rectangle onto a GMD scalloped stitched rectangle die cut in black and the card was complete!

Remember, we have a monthly challenge going on right right now in the SumMore Fun Creations Facebook group!

I hope you have a wonderfully crafty day!

New to SumMore Fun?
Click the store link below for an automatic 10% discount off your purchase!
Or use BETH10 as your discount code at checkout for 10% off.
Check out the SumMore Fun Store

You can find me at these links on Social Media:

Monday, November 26, 2018

Christmas Treats with Annie's Paper Boutique

Happy Monday!  The Trendy Twine DT is showcasing some fun Christmas treat projects today that use Annie's Paper Boutique stamps.  Hop on over to the Twine It Up! blog for all the inspiration!
I started with a Mini 4oz. Cup and wrapped it with paper from DCWV's Blue Noel stack.  I used Scor-tape to adhere it to the cup to make sure it would stick well!
I decorated the top with a die cut and stamped a sentiment from the APB Let It Snow stamp set in a 1" circle for the top.  A few Peppermint Icicle Sequins adhered with Glue Dots and the top was done!
I wrapped Peppermint Icicle Trendy Twine around the lid of the cup then let two strands hang.  To those, I attached die cut mittens from SVG Attic.  They are sized at 2" tall.  Then I added the "cold hands, warm heart" sentiment from the APB Let It Snow stamp set to a banner and tied it to the lid with two jingle bells and more of the Peppermint Icicle Trendy Twine.  I also added the negative die cut of the snowflakes from the mittens on the sides of the cup and more of the Peppermint Icicle Sequins for a finishing touch.

Here's what I used from Annie's Paper Boutique:
If you are new to Trendy Twine, you will want to check out these fun places:
Shop for Trendy Twine HERE
Follow Trendy Twine on Facebook