Friday, December 28, 2018

Winter Thanks Card

Good Morning!
Due to medical reasons, SumMore Fun is making changes. They're liquidating the stamp sets and selling off the expo and red rubber side of the business. Know someone who might be interested? Have them contact SumMore Fun.

They're keeping the stamp rentals and the monthly clubs. If you want to rent their fabulous stamp set designs, visit www.rentsummorefun.com.

Subscribe to the SumMore Fun newsletter for details of which stamps are being discounted and when.

Because of this we will no longer be running monthly challenges. The design team will still be sharing their inspiration using our stamps so you can see the possibilities with them...

My inspiration card uses the Victorine Originals Watercolor Snowman set.
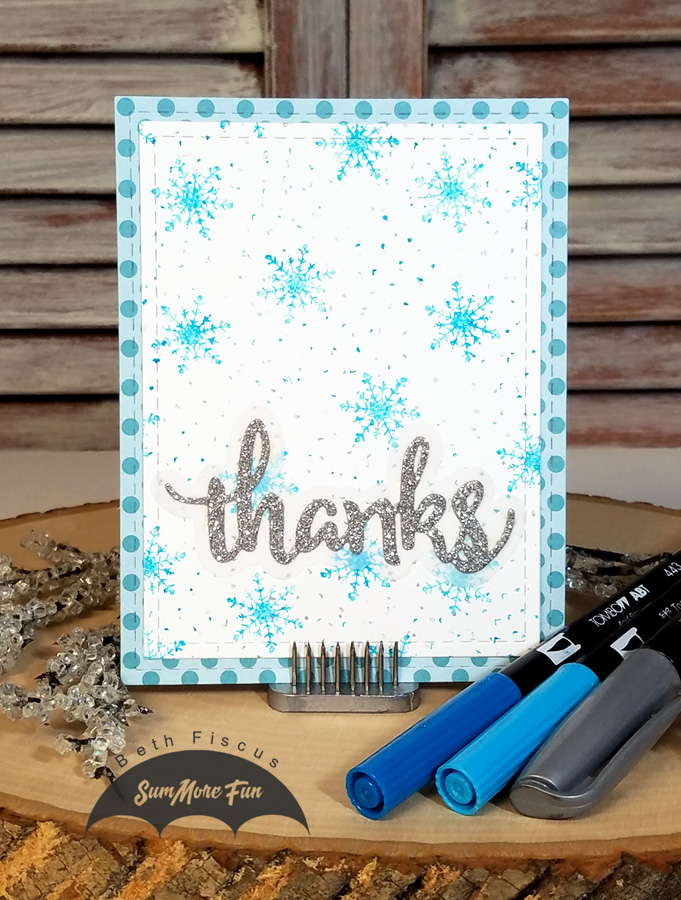
My use of markers was to use those instead of ink pads with the stamps to create this pretty background!  I used the lighter blue Tombow marker for the snowflakes and the darker blue and silver markers for the snowflake dots over the whole white paper.
Other products used were patterned paper, vellum, glitter paper, stitched rectangle dies, thanks dies and adhesives.

I hope you have a wonderfully crafty day!

New to SumMore Fun?
Click the store link below for an automatic 10% discount off your purchase!
Or use BETH10 as your discount code at checkout for 10% off.
Check out the SumMore Fun Store

You can find me at these links on Social Media:

Wednesday, December 26, 2018

Pine Tree Silhouette Card

Good Morning!  Today is my day to post on the SumMore Fun blog.  The card I am sharing with you uses their Raisin Boat Merry Nature stamp set.
I started out by stamping the trees and the sentiment using Versafine Onyx Black ink and embossing it with WOW White Pearl embossing powder.  It makes such a beautiful pearly silver look!  Then I used Distress Oxide inks in Faded Jeans, Broken China, and Black Soot to blend in a winter night look.
I splashed water on the background, making the Distress Oxides lift a bit, then added dots of liquid applique so it looked like snow.  I mounted the stamped rectangle onto a GMD scalloped stitched rectangle die cut in black and the card was complete!

Remember, we have a monthly challenge going on right right now in the SumMore Fun Creations Facebook group!

I hope you have a wonderfully crafty day!

New to SumMore Fun?
Click the store link below for an automatic 10% discount off your purchase!
Or use BETH10 as your discount code at checkout for 10% off.
Check out the SumMore Fun Store

You can find me at these links on Social Media:

Tuesday, December 25, 2018

Trendy Bakers Twine ~ Merry Christmas

Merry Christmas!  Today the Trendy Twine DT and GDT are sharing beautiful Christmas cards on the Twine It Up blog.  Hop on over to see what they all have created!  This is my card to share with you...
I started with lots of pretty papers from DCWV's Red & White Christmas stack.  I wanted that sentiment panel to be the focal point, so I wrapped Peppermint Stick Trendy Twine around it, leaving two long tails for a little extra visual interest.  It is popped up with foam tape on the front of the card.
To embellish, I glued pieces from the Christmas Shaker Medley in the bottom left corner.  I thought it was just the right amount of bling for this card!

Here's what I used from Annie's Paper Boutique:
If you are new to Trendy Twine, you will want to check out these fun places:
Shop for Trendy Twine HERE
Follow Trendy Twine on Facebook

Monday, December 24, 2018

Trendy Bakers Twine ~ Candy Box

Hello all!  Today I am posting for the Trendy Twine blog with this treat box. It is embellished with Peppermint Stick Trendy Twine, our featured twine for December.  My 6 year old wanted to make this box for his aunt, so he picked out all the different elements he wanted to use.
He started with a Biggie Kraft Box and covered all the sides with squares of cardstock from DCWV's Red & White Christmas stack.  He also added stickers from that stack on the top and front.
The bow was created using the Stampin Up! bow builder punch.
We punched two holes in the top and threaded Peppermint Stick Trendy Twine through them, tying knots on the inside.  We left a loop on top of the box to hold the handle of a Mini Wooden Scoop.  Then we took the long end of the Peppermint Stick Trendy Twine and wrapped it around the box, securing the Mini Wooden Scoop to the end of the twine.
Here is a look at the inside of the lid, so you can see how we attached the twine and how the scoop fits inside to scoop out the candy!
Here is my little guy with his creation!

Here's what he used from Annie's Paper Boutique:
If you are new to Trendy Twine, you will want to check out these fun places:
Shop for Trendy Twine HERE
Follow Trendy Twine on Facebook