Friday, February 28, 2020

Cupcake Birthday Girl Cards

Hello friends!  Today I am sharing a couple of cards I recently made using stamps from Unity's SO Glad You Were Born set.  
I inked up the cupcake stamp using black ink and stamped it on white cardstock.  Once it was dry, I used my Brother Scan N Cut to fussy cut them.  I used Scrapbook.com inks to watercolor the cupcakes and hearts and sat them aside to dry.
The white card panel was prepped by die cutting with a GMD stitched rectangle die and used the GMD Flower Petal Collage stencil and a coordinating Scrapbook.com ink with a makeup blending brush to create the pretty design.  I then stamped the sentiment in black ink.  I matted that onto the card base with the patterned paper and colored cardstock cut with a GMD scalloped stitched rectangle.
I added a strip of patterned paper and a bow of Trendy Twine onto the front of the card.
The cupcake was adhered with foam tape.  The hearts were simple glued in place.  As a final touch, I added glossy accents to the hearts, cheeks and a few random dots near the sentiment.
I hope you have a wonderfully crafty day!

Wednesday, February 26, 2020

Tractor Birthday Card

Welcome to another Wednesday project for SumMore Fun!  This time I have a masculine card to share that uses the Raisin Boat Homegrown and Flourishing Thoughts stamp sets.
First of all, I stamped the awesome tractor stamp from the Raisin Boat Homegrown set with VersaFine Onyx Black ink. Once that was dry, I used watercolor pencils and a water brush to add the color.  The panel was die cut with a GMD stitched rectangle die, then matted with a black rectangle die cut with a GMD wonky stitched rectangle die.  The panel was popped up with foam tape onto the card base.
The patterned papers in TPS Yee-Haw! paper pad were perfect for this card.  The sentiment was from the Raisin Boat Flourishing Thoughts stamp set and was stamped with SB.com Succulent ink.  To embellish, I added burlap ribbon and dots of silver Pearl Pen (which were not centered like I had originally intended...oops!).  I guess imperfection is part of life, right?
I hope you have a wonderfully crafty day!

New to SumMore Fun?
Check out the SumMore Fun Store
Use BETH10 as your discount code at checkout for 10% off.

You can find me at these links on Social Media:

Friday, February 21, 2020

Get It Girl Quick Cards

Hello all!  Do you ever need a card quick?  As in - I need to send a card out today and mail gets picked up in 20 minutes - quick?  If so, then I have just the cards for you!
 I created all four of these cards using the brand new DCWV Get It Girl stack.  Seriously.  All the patterned papers, sentiment panels, and flowers were from that one stack!  It made putting these cards together a snap.  These will be perfect encouragement cards to send out.  
For all the cards I used a Cottage Cutz stitched rounded rectangle die to cut the sentiment panel.
On the top card, I popped the sentiment panel up with foam tape and added three white pearl pen dots.  The card below has the sentiment panel adhered with ATG, but the fussy cut flower in the corner was popped up with foam tape.
This third card has the sentiment panel popped up with foam tape and I used my Brother Scan N Cut to cut around flowers on a different paper so I could glue them onto the panel.  I really love how those flowers look!
The final card is really eye-catching with the bright mustard color!  I'll admit, I am not usually a yellow person, but the prints in this stack really inspired me to create with them.  The only accent I used on this card was Bumblebee Trendy Twine.
If you haven't seen a flip through of the DCWV Get It Girl stack yet, here is a video of it I made:
I hope you have a wonderfully crafty day!

Wednesday, February 19, 2020

32 Cards From One 6x6 Paper Pad

Raise your hand if you are completely in awe of Kristie Marcotte and her ability to power through entire 6x6 paper pads...yeah me too!  For my SumMore Fun blog post today I decided to embrace that challenge for myself!  It wasn't easy and took me three days off and on to finish the paper pad, but I ended up with these 32 cards.
I used the My Mind's Eye My Favorite Things 6x6 paper pad.  I have had it floating around in my craft room for quite some time.  I picked it because it had both masculine and feminine papers in it.  I will say that I should have been more selective because some of the papers were geared more towards scrapbooking and that left me with only side of paper to use with those sheets.  However, it didn't stop me :)
In true Kristie style, I started with some card sketches.  This first set of cards were made with Reverse Confetti sketch #32.  
I used the following supplies on these cards:
  • Raisin Boat Talking in Circles stamp set (only $3.99 right now!)
  • Scrapbook.com Pine hybrid ink
  • Scrapbook.com Pink Lemonade hybrid ink
  • Cottage Cutz stitched circle dies
  • brads
  • brown and coral Recollections cardstock
  • flower

The second set of cards were made with Reverse Confetti sketch #53.  
I used the following supplies on these cards:
  • Raisin Boat Night Owl stamp set
  • Raisin Boat All In Toile stamp set
  • Scrapbook.com Black hybrid ink
  • Scrapbook.com Succulent hybrid ink
  • Scrapbook.com Camel hybrid ink (inking around the edge of the owl)
  • colored pencils
  • Brother Scan N Cut (owl and party hat)
  • Scrapbook.com Pink Lemonade hybrid ink
  • Gray, tan, and black Recollections cardstock
  • Twisted Lime Trendy Twine
The third set of cards were made with Reverse Confetti sketch #34.  
I used the following supplies on these cards:
  • Raisin Boat Talking In Circles stamp set
  • Scrapbook.com Charcoal hybrid ink
  • Cottage Cutz stitched square die
  • black Recollections cardstock
  • circle punch
  • markers
  • Glossy Accents (on bottom right circles and flower centers)
These baby cards were created with OWH Sketch #154.
I used the following supplies on these cards:
  • Raisin Boat Talking In Circles stamp set
  • Scrapbook.com Daffodil hybrid ink
  • Cottage Cutz scalloped stitched circle die
  • Cottage Cutz stitched circle die
  • black Recollections cardstock
  • Totally Lemon Trendy Twine
  • diaper pin brad
The last cards made from a sketch used OWH sketch #142.
I used the following supplies on these cards:
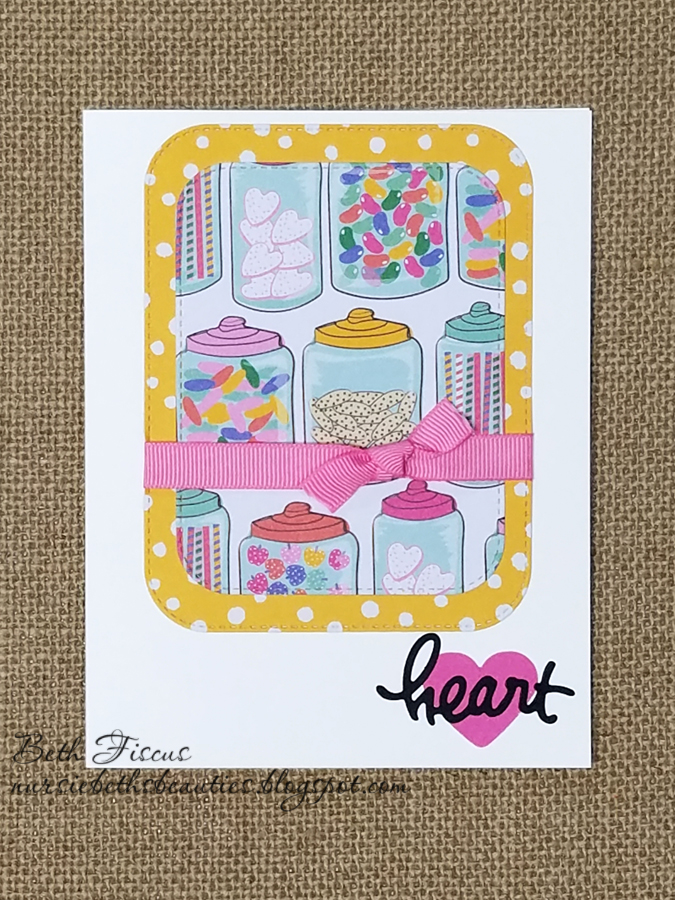
The following cards were not made with any type of sketch.  I was simply using up the papers I had left from the paper pad.
These fish cards were created using the following additional supplies:
  • Raisin Boat Time Flies stamp set
  • Raisin Boat No Loss For Words stamp set
  • Scrapbook.com Black hybrid ink
  • Scrapbook.com Caribbean hybrid ink (blended with brush)
  • watercolored fish with Scrapbook.com Succulent, Pink Flamingo, and Sugar Cookie hybrid inks
  • Cottage Cutz stitched rounded rectangle dies
  • black Recollections cardstock
  • white gel pen
  • silver brads
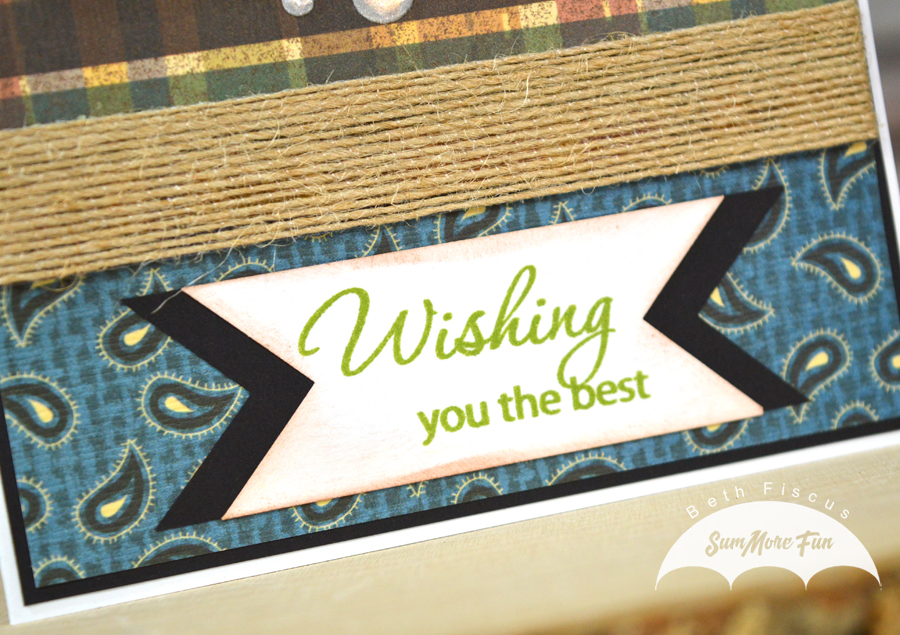
The next two cards each have a different layout, but are similar with their elements.
Supplies used include:
  • Raisin Boat Talking In Circles stamp set
  • Scrapbook.com Succulent hybrid ink
  • GMD double stitched in and out circle die
  • Cottage Cutz scalloped stitched circle die
  • black Recollections cardstock
  • Totally Lemon Trendy Twine
  • Scrapbook.com Charcoal hybrid ink
  • Totally Black Trendy Twine
  • White Pearl Pearl Pen
Supplies for the two butterfly cards include:
  • Raisin Boat No Loss For Words stamp set
  • Scrapbook.com Black hybrid ink
  • Cottage Cutz Kayla Butterfly die
  • Cottage Cutz scalloped stitched circle die
  • label die
  • black, gray, white Recollections cardstock
  • Totally Lemon Trendy Twine
These final four cards really were using up the last of the last scraps!
The Happy Birthday cards supplies include:

The final card supplies include:
Adhesives used on all cards include ATG, foam tape, and Scotch Tacky Glue.  I used up every little bit of those patterned papers.  The last couple scraps were used for embellishments and die cutting.

Whew!  Did you make it all the way through this post?  If so, I hope you are inspired to try something new with your crafting...maybe even crafting your way through a whole paper pad like I did!

I hope you have a wonderfully crafty day!

New to SumMore Fun?
Check out the SumMore Fun Store
Use BETH10 as your discount code at checkout for 10% off.

You can find me at these links on Social Media:

Friday, February 14, 2020

Trendy Bakers Twine~Turquoise Valentine

Happy Valentine's Day!  Today I am posting on the Trendy Twine blog with this somewhat atypical valentine.  Instead of the traditional reds and pinks, the primary color is turquoise!
Truly the reason this card even came to be was because of that pretty flower sticker behind the heart.  I searched through my craft room to find ALL the coordinating things!  I decided to have it peek from behind a die cut heart that was popped up with foam tape.  The white panel was cut using a GMD pleated lace square die.
The background floral paper is from The Paper Studio Pretty Petals paper pad and the bottom layer was die cut with a GMD scalloped stitched rectangle die.  before adhering everything to the card base, I wrapped Tickled With Teal Trendy Twine around it, and added a small die cut tag with a bow.  The sentiment was stamped in Scrapbook.com Mermaid hybrid ink using a Raisin Boat stamp.

Here is what I used from Annie's Paper Boutique:

There also have been SEVERAL new sampler sets added to the store, including Valentine's day ones.  Here is just one example called "Lovely".

If you are new to Trendy Twine, you will want to check out these fun places:
Shop for Trendy Twine HERE
Follow Trendy Twine on Facebook

Thursday, February 13, 2020

Heart Valentine's Day Cards

Hello all!  Tomorrow is Valentine's Day and I hope that my family members have already received these cards in the mail so the surprise isn't ruined ;)  These were all created with the adorable papers from Park Lane 6x8" Happy Day paper pad from Joann's.
The reason I chose the jar paper for valentines was because of those adorable heart cookies!  So sweet!  The other supplies I used on the cards include: Cottage Cutz stitched rounded rectangle dies, Momenta sentiment die, ribbon, heart punchATG, and Scotch Tacky Glue.
I hope you have a wonderfully crafty day!

Wednesday, February 12, 2020

Rainbow Floral Love Card

Hello again!  I am back with another card for the SumMore Fun blog.  Today I have a rainbow "love" card that could easily be used for Valentine's Day, but I actually sent this one out as a birthday card.  It works great for any occasion!
The stamp I used was from Raisin Boat's Imagine stamp set.  It is a huge stamp!  Using a stamp platform is a must for this technique.  I started inking up my stamp a little section at a time from left to right with the following Scrapbook.com inks:  Mardi Gras, Mermaid, Daffodil, Orange Spice, and Confetti Pink.  I cleaned my stamp after each color so I wouldn't transfer the ink to the next ink pad.  It was the first time I had done this technique and looking back, I wished I had taken a damp paintbrush to feather out the edges of the ink on the stamp before stamping so the lines between the darker colors would have been more blurred.  Live and learn I guess!  I think it still turned out pretty :)  I finished off the card with a die cut black cardstock layer and coordinating striped patterned paper.

I hope you have a wonderfully crafty day!

New to SumMore Fun?
Check out the SumMore Fun Store
Use BETH10 as your discount code at checkout for 10% off.

You can find me at these links on Social Media:

Monday, February 10, 2020

God Bless You Floral Card

Hello, crafty friends! I am back again with another beautiful project that uses the papers from the DCWV Get It Girl stack.  This stack and other new ones should be available in Joann's stores now! This time I made a card. 
Once again, I was blown away by the beautiful prints in the Get It Girl stack.  Every piece of paper you see on this card came from it.  I paired the floral print with a lacy edged rectangle die for the background. I fussy cut the flowers in the top left corner from one of the pages.  The sentiment was from the Raisin Boat Flourishing Thoughts stamp set and was stamped in SB.com Charcoal ink, then in VersaMark and heat embossed with WOW! Clear sparkle powder. They mean it when they say sparkle!  It is SO shiny!
I used GMD stitched rectangle dies for around the sentiment.  The flowers and sentiment panel were popped up with foam tape. The finishing touch were three pink enamel dots.
Stop by my YouTube Channel for a flip through video of all the papers in the Get It Girl stack.

I hope you are able to make it to a Joann Fabrics store soon to check out the new DCWV stacks there!  Have a wonderfully crafty day!

Friday, February 07, 2020

Cutest Valentine Ever Layout

Hello all!  I recently was blessed with a brand new stack from DCWV!  It is called Get It Girl and will be available in Joann Fabrics stores soon.  I had these pictures from last Valentine's Day sitting on my craft table waiting to be scrapbooked and the papers couldn't have been a more perfect match!
Once I decided on the perfect background paper, I simply decided on additional elements and coordinating papers from the DCWV Get It Girl stack to layer with.  When I am working on a layout, I like to place it on my WRMK Magnetic Cutting Mat with small magnets so I can rearrange everything as I wish until I have just the right look.  The title was a free cut file from DesignBundles.net and I could have cut it out with cardstock, but I decided to use vinyl and transfer tape for easy adhering and positioning!
I embellished with different sayings from the paper stack, Cherry Cupcake Trendy Twine, and GMD Soft Pink Pearls.  So make sure to swing by your favorite Joann Fabrics store to see what brand new DCWV products they have!  You just might be able to get your hands on these beautiful papers!
Stop by my YouTube Channel for a flip through video of the Get It Girl stack!


I hope you have a wonderfully crafty day!

Wednesday, February 05, 2020

Valentine's Day Duo of Cards

Hello all!  I have been creating for Valentines day and loving every minute of it!  Today I have a post for the SumMore Fun blog with a duo of cards, one of which used the negative space from the die cutting of the other.
This was the first card I created.  I stamped the brush strokes from Raisin Boat's Strokes of Pride stamp set and a stamp platform.  The colors of Scrapbook.com inks I used from top to bottom are:  Pink Flamingo, Candy Shop Pink, Confetti Pink, Mixed Berry, and Cardinal Red.  I flipped the cardstock between each color, so the brush stroke would be reversed from the previous stamping.  I then die cut a heart out of white cardstock and also cut a smaller heart out of the center to create a peek-a-boo for the stamping on the base layer.
At the bottom of the card, I added the LOVE sentiment from the Raisin Boat No Loss For Words stamp set with black ink.  I embellished with Pearl Pen dots in Pearl Pink and Red.  Once those were dry, I mounted the stamped panel onto a black layer, then adhered it to my card base.
The second card is very similar to the first, but as I mentioned earlier, I used the negative white cardstock from the die cutting of first card to create the front of this one.  Once again, I stamped the brush strokes from Raisin Boat's Strokes of Pride stamp set with a stamp platform in the same manner as the first card.  Then I trimmed down the die cut panel so the brush strokes would be visible on the outside of the panel as well as through the heart.
Once again, the bottom of the card was stamped with the LOVE sentiment from the Raisin Boat No Loss For Words stamp set in black ink.  I embellished with Pearl Pen dots in Pearl Pink and Red.  The front panel was popped up with foam tape and the card was complete!

I hope you have a wonderfully crafty day!

New to SumMore Fun?
Check out the SumMore Fun Store
Use BETH10 as your discount code at checkout for 10% off.

You can find me at these links on Social Media: